Migration to the cloud is the most popular data storage and exchange platform for both large businesses and small organizations as it is the safest and most affordable backup location. Email client data, such as Outlook for Mac OLM files, is unsafe or prone to corruption because the OLM file is located in the system folder rather than the internet. The risk of corruption is always there. On the other hand, Microsoft 365 only needs login data and is accessible on any system. It also provides a lot of services for users like Microsoft. Exchange Online, Outlook for Azure Web, SharePoint, Yammer, One Drive, etc. Accessibility from anywhere on the cloud platform is another benefit of large and secure data storage services. The Microsoft 365 platform is also popular because of its scalability and flexibility in plans and Subscriptions preferred and features.

Recently, we have received a lot of inquiries from users who requested a reliable solution to move data from Outlook for Mac to a cloud account. And for users who currently use or have OLM files and want to move their data to the cloud location immediately, This blog will come in handy Read and understand the following solutions on how to Import OLM files into a Microsoft O-365 account.
Manual Method to Import OLM file to Microsoft O365.
The native solution for importing Mac OLM into Microsoft O365 is indirect and time-consuming, and it is recommended that you back up your OLM files before doing this process. Here is the full explanation of the process.
Setting up an IMAP account in Gmail and arranging it in Outlook for Mac
In the first steps, let us realize the necessary strides to set up an IMAP account in the Gmail application.
Note: If you don’t have a Gmail account, you need to create a Gmail Account.
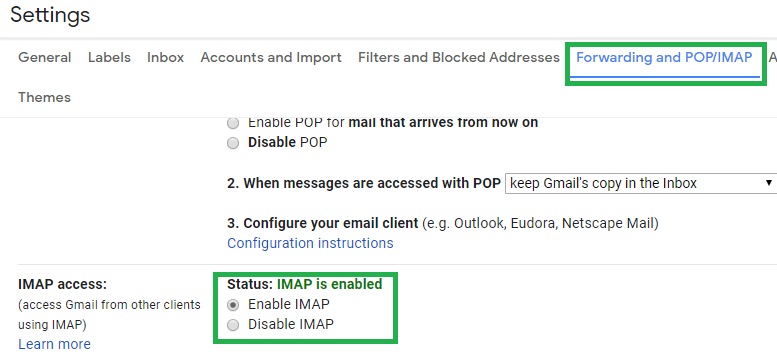
- Sign in to your Gmail account and go to the Settings choice.
- On the Settings page, change to the Forwarding and POP/IMAP tab. Then, at that point, under the IMAP Access segment, click on Enable IMAP choice.
- Now, go to the Outlook for Mac application. Here, click on Send/Receive alternative with the goal that the synchronization interaction begins.
- Stand by till the total information move happen.
Configuring Gmail IMAP account in Outlook and afterward moving to Cloud O-365
This is the last phase of this native solution for import OLM to Microsoft 365. You simply need to design IMAP account in Outlook utilizing Account Settings element of Outlook by adding another IMAP account utilizing Gmail qualifications. When the Gmail account is arranged in the Outlook application, then, at that point, every one of the information is accessible in the Outlook which you can move to the PST organizers also by means of drag-drop or duplicate glue alternatives.
At long last, to move OLM information inside Outlook PST File to Microsoft 365, it is possible that you can arrange Microsoft 365 record in Outlook and afterward move OLM information to Microsoft 365 letter box organizer or utilize the cloud Import include (Network Upload technique) to import Outlook information in it by transferring the PST documents utilizing Microsoft in-constructed utility Azure AzCopy apparatus.
Note: There is another strategy called as Drive Shipping technique to move OLM traded Outlook PST File to Microsoft 365 Account. In this strategy, PST files are duplicated to a BitLocker-encoded hard Process and afterward this hard plate is transported to Microsoft 365 actually. In the wake of preparing the hard plate, the Microsoft faculty would transfer PST File on the Microsoft 365 transitory area. This Process consummation requires some investment around multi week or more than that which is negative to the clients in criticalness.
As should be obvious and furthermore referenced toward the beginning of the above interaction that it is a very long cycle and furthermore need cautious, gifted hands for execution. Any minor mix-up whatsoever stage can prompt more difficulties all the while and afterward could bring about information misfortune or disappointment of movement. Also, the manual arrangement clarified above requires two Operating System conditions simultaneously which is hard now and again and the most noticeably terrible, the information trustworthiness of the documents or messages can get hampered during the cycle. These manual arrangements are rebels for enormous scope undertaking movements.
Direct Method – Professional One Solution SysVita OLM Converter
We can’t assurance of the manual answers for effective Export OLM to Microsoft Cloud O365. Along these lines, we have and propose a mechanized answer for play out this movement Process from Outlook for Mac to Microsoft O365 Platform. As we previously talked about over that there is no immediate technique to import OLM File to Office 365. So we give you a simple and easy computerized SysVIta OLM to PST Converter Software that can Migrate OLM to Office365 & PST and Multiple different configurations.
It is an effectively customized programming with strong calculations having the ability to import OLM to Microsoft 365 through a single direction direct strategy. The client even doesn’t need Outlook for Mac or Outlook application to execute this cycle. It incorporates see highlights and numerous channel decisions for clients to isolate the information for movement. Simply follow some basic strides to Import OLM to Microsoft O365 Account.
How to Work SysVita OLM Converter In Windows PC?
The instrument guarantees total information movement, similar to Emails, Contacts, Calendars, Tasks, Journals. It is an independent utility to move OLM documents to Office 365 Account.
All the mentioned steps are tested and verified. You can perform it and easily migrate OLM files to Office 365.
Step-1: Download Software and Install on your Windows computer system. The home screen will appear like this.
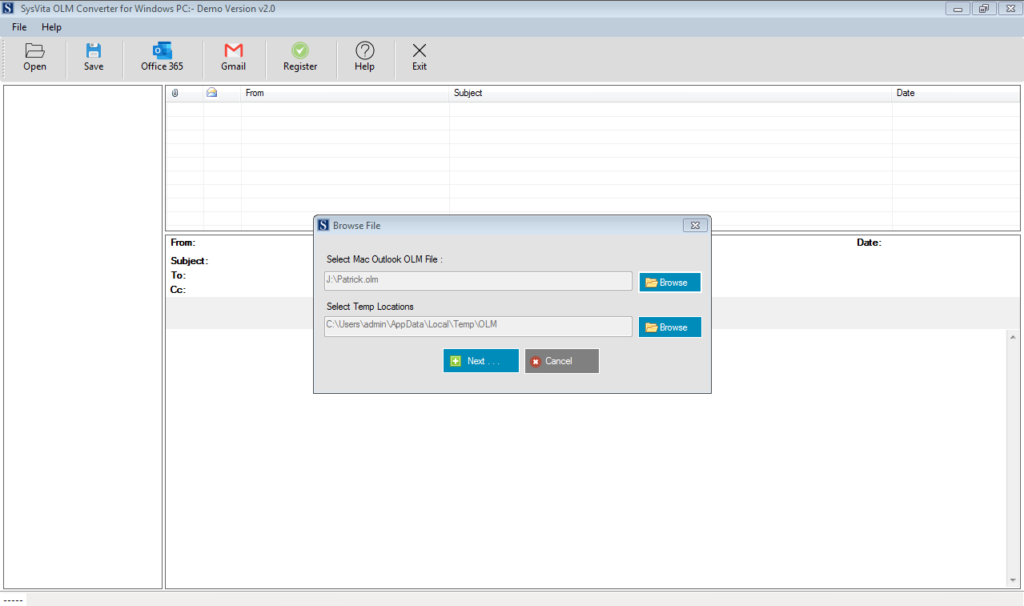
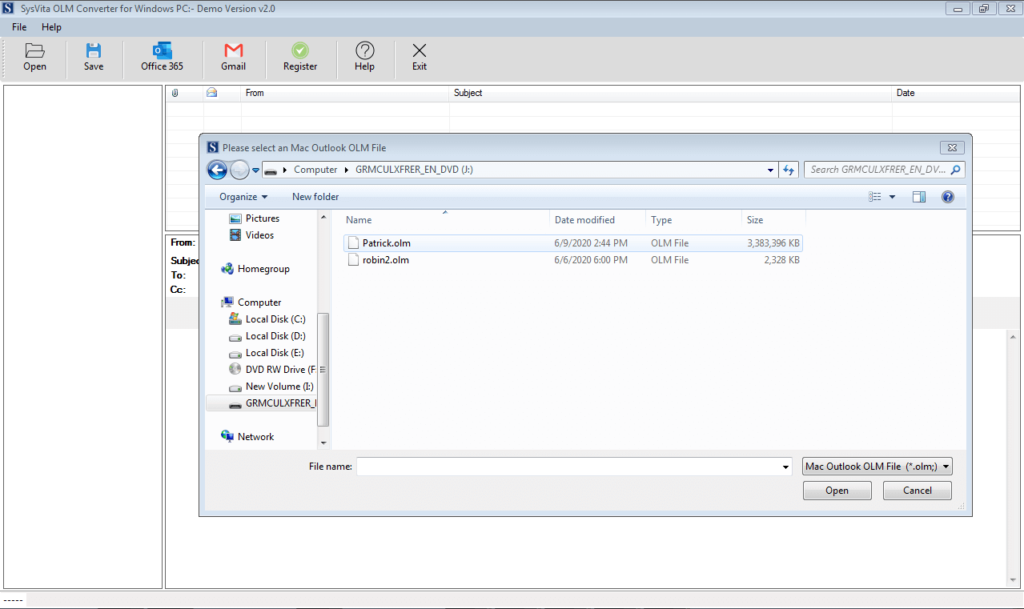
Step 2: – Click on the Browse Button File option to browse and load OLM files in the software. After you select the file you want to convert, the tool will scan them and add them to the interface.
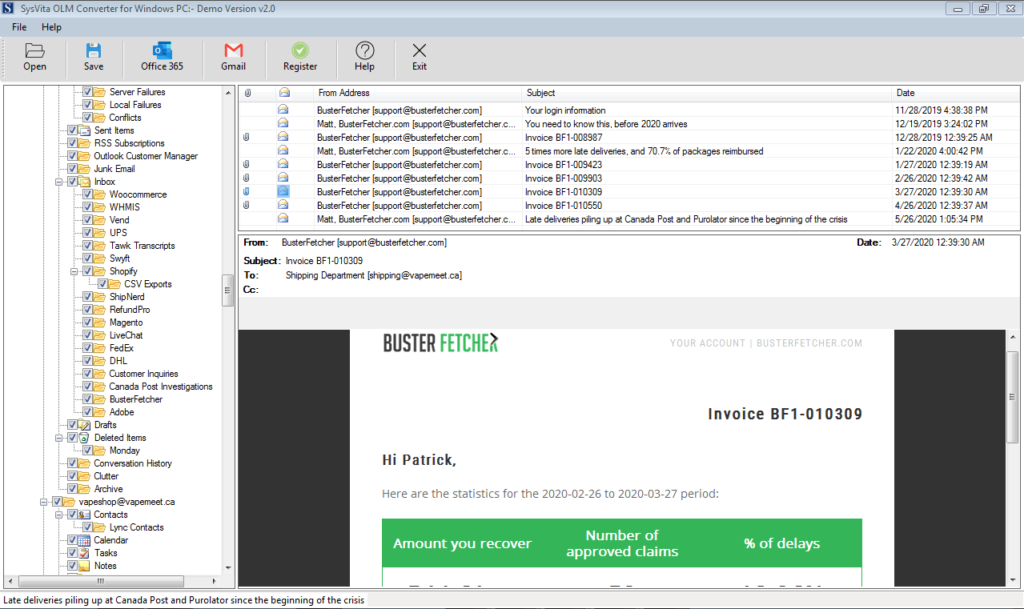
Step 3: – Next, you can preview the files in various view modes available. Now, select the OLM files to export and click on Export.
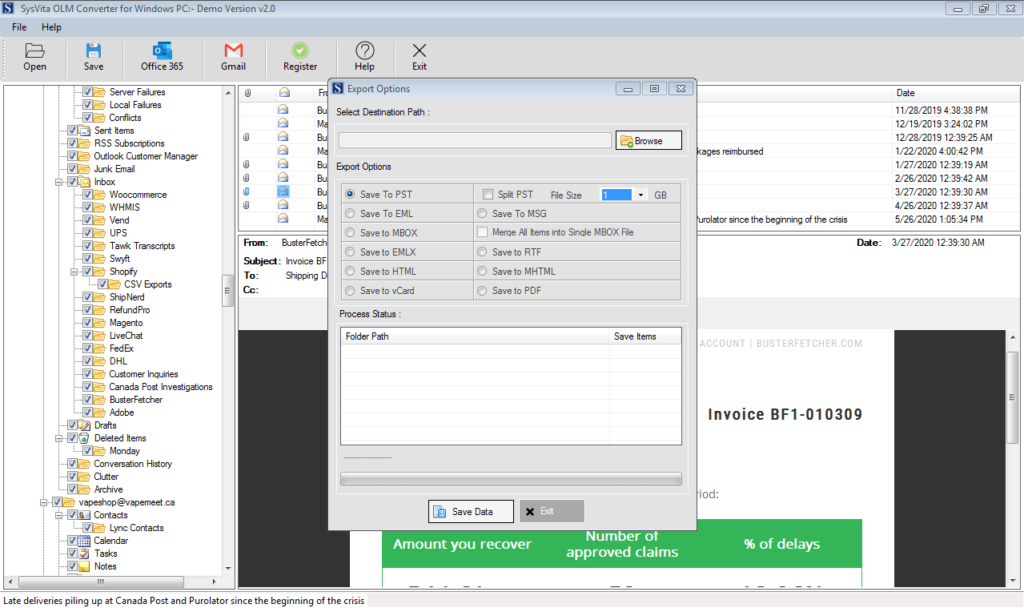
Step 4: – Choose the Convert option to Export OLM file to PST, MSG, MBOX, HTML, EML, EMLX, PDF etc. Now, click on the Convert button.
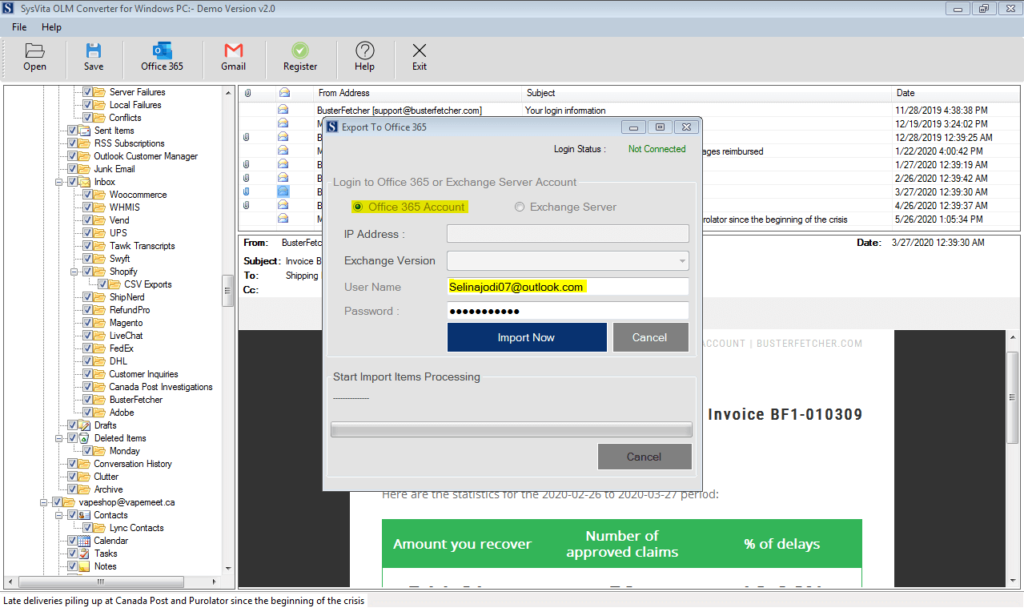
Step 4: – Choose the Office 365 option to OLM file to Office 365. Now, click on Office365.
Note: – You have successfully migrated completed data from Mac Outlook OLM files into Microsoft Office 365 account. You can use this utility on Windows 11, 10, 8, 7, versions.
How to Work SysVita OLM Converter In MAC-PC?
All the mentioned steps are Export OLM to Office365. You can perform it and easily migrate OLM files to Office 365
Step 1: – Download Software and Install on your Mac system. The home screen will appear like this.
Note: Click Add File to Select OLM file single and Multiple.
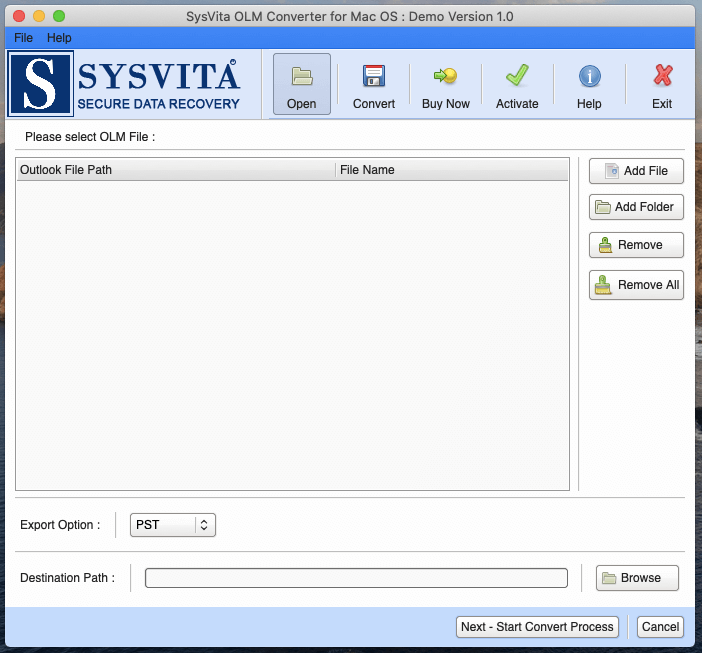
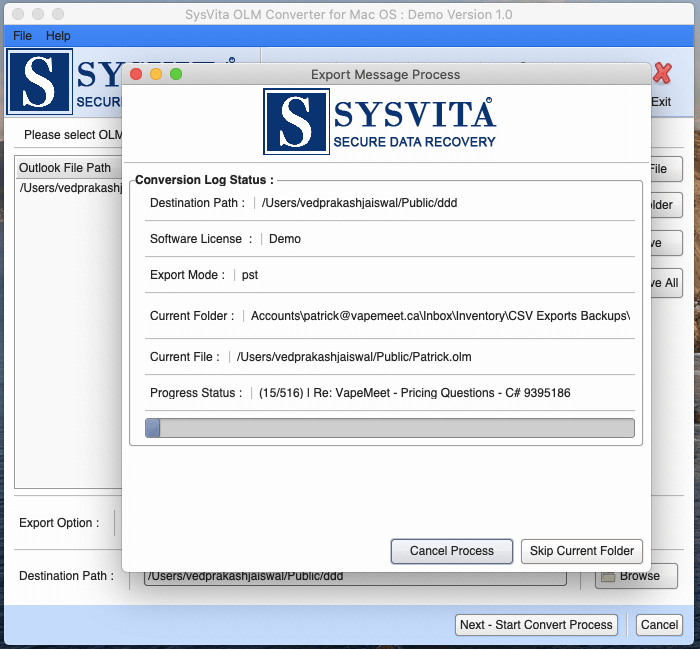
Step 2: – Click on the Add File or Add Folder option to browse and load OLM files in the software. After you select the file you want to convert, the tool will scan them and add them to the interface.
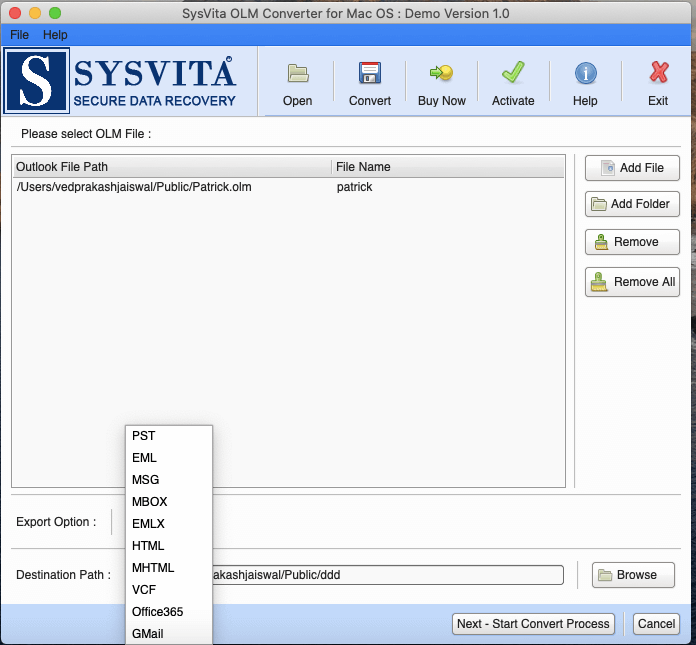
Step 3: – Select the office365 option to Export olm file to Office365.
Last Words
Rather than going for a multi-organized, dangerous manual Process to import OLM to Microsoft 365, choosing the most gotten OLM Converter apparatus would be the astute decision which ends up moving OLM to Microsoft 365 in around 4-5 basic and direct advances.